ProcessOut Permission Model Explained
Before reading this section, it's advised you have a good understanding of how organization hierarchy works in ProcessOut. Please refer to the Organization Hierarchy part of the documentation.
We offer a very flexible mechanism for managing access in ProcessOut through the use of permissions, roles, members, teams, and project hierarchy. This section will explain the basic concepts for Dashboard and API access management.
Dashboard access
The dashboard permission model is based on a "What, Where, Who" model. What is specified by Roles, Where by Organization Hierarchy, and Who by Member or Team (group of members). Access can only be granted once you create a link between all three.
Where – the Hierarchy
You would usually start by defining your organization's hierarchy. In the hierarchy, access will always cascade down, for example; if your organization consists of 3 groups nested in one another, like "Europe" > "Spain" > "Andalusia", defining later access on the Europe level will cascade down to Andalusia and all projects underneath (also to any projects directly under Spain and Europe or under any groups that will be created in future under "Europe"). Keep this in mind when defining your hierarchy – you probably don't want to update your permissions each time you add a new project to your Organization.
What – the Role
Once you have your initial version of the hierarchy, the next step will be to create roles. A role defines a set of low-level permissions, like "view analytics," "refund transaction," etc. Roles are divided into seven categories to make management easier (more about roles in Roles Management). An example of a role might be a "Payments Analyst," which grants read access to Analytics and Transactions but provides no access to sections like configuring API keys or changing providers' configuration. Note that a role by itself does not define access to any project.
Who – The member and the team
After defining hierarchy and roles, it's time to invite some members and grant them access. You can invite new members in the Members section (more on how to do it in the Members section below). During the invitation process (or when editing existing members), you can create the link between What, Where, and Who. For example, you can attach the "Payments Analyst" role (what) to our new member (who) and restrict it to any projects under the "Europe" group (where). You can additionally create a team with multiple members inside and create the link between hierarchy and role on the team rather than a single member. In our example, imagine creating a group "European Payments Analysts" and granting the team "Payments Analyst" role on all projects under "Europe" group. Any new member added to the group will automatically get all the access needed.
See below how the connection of the three entities can define access:
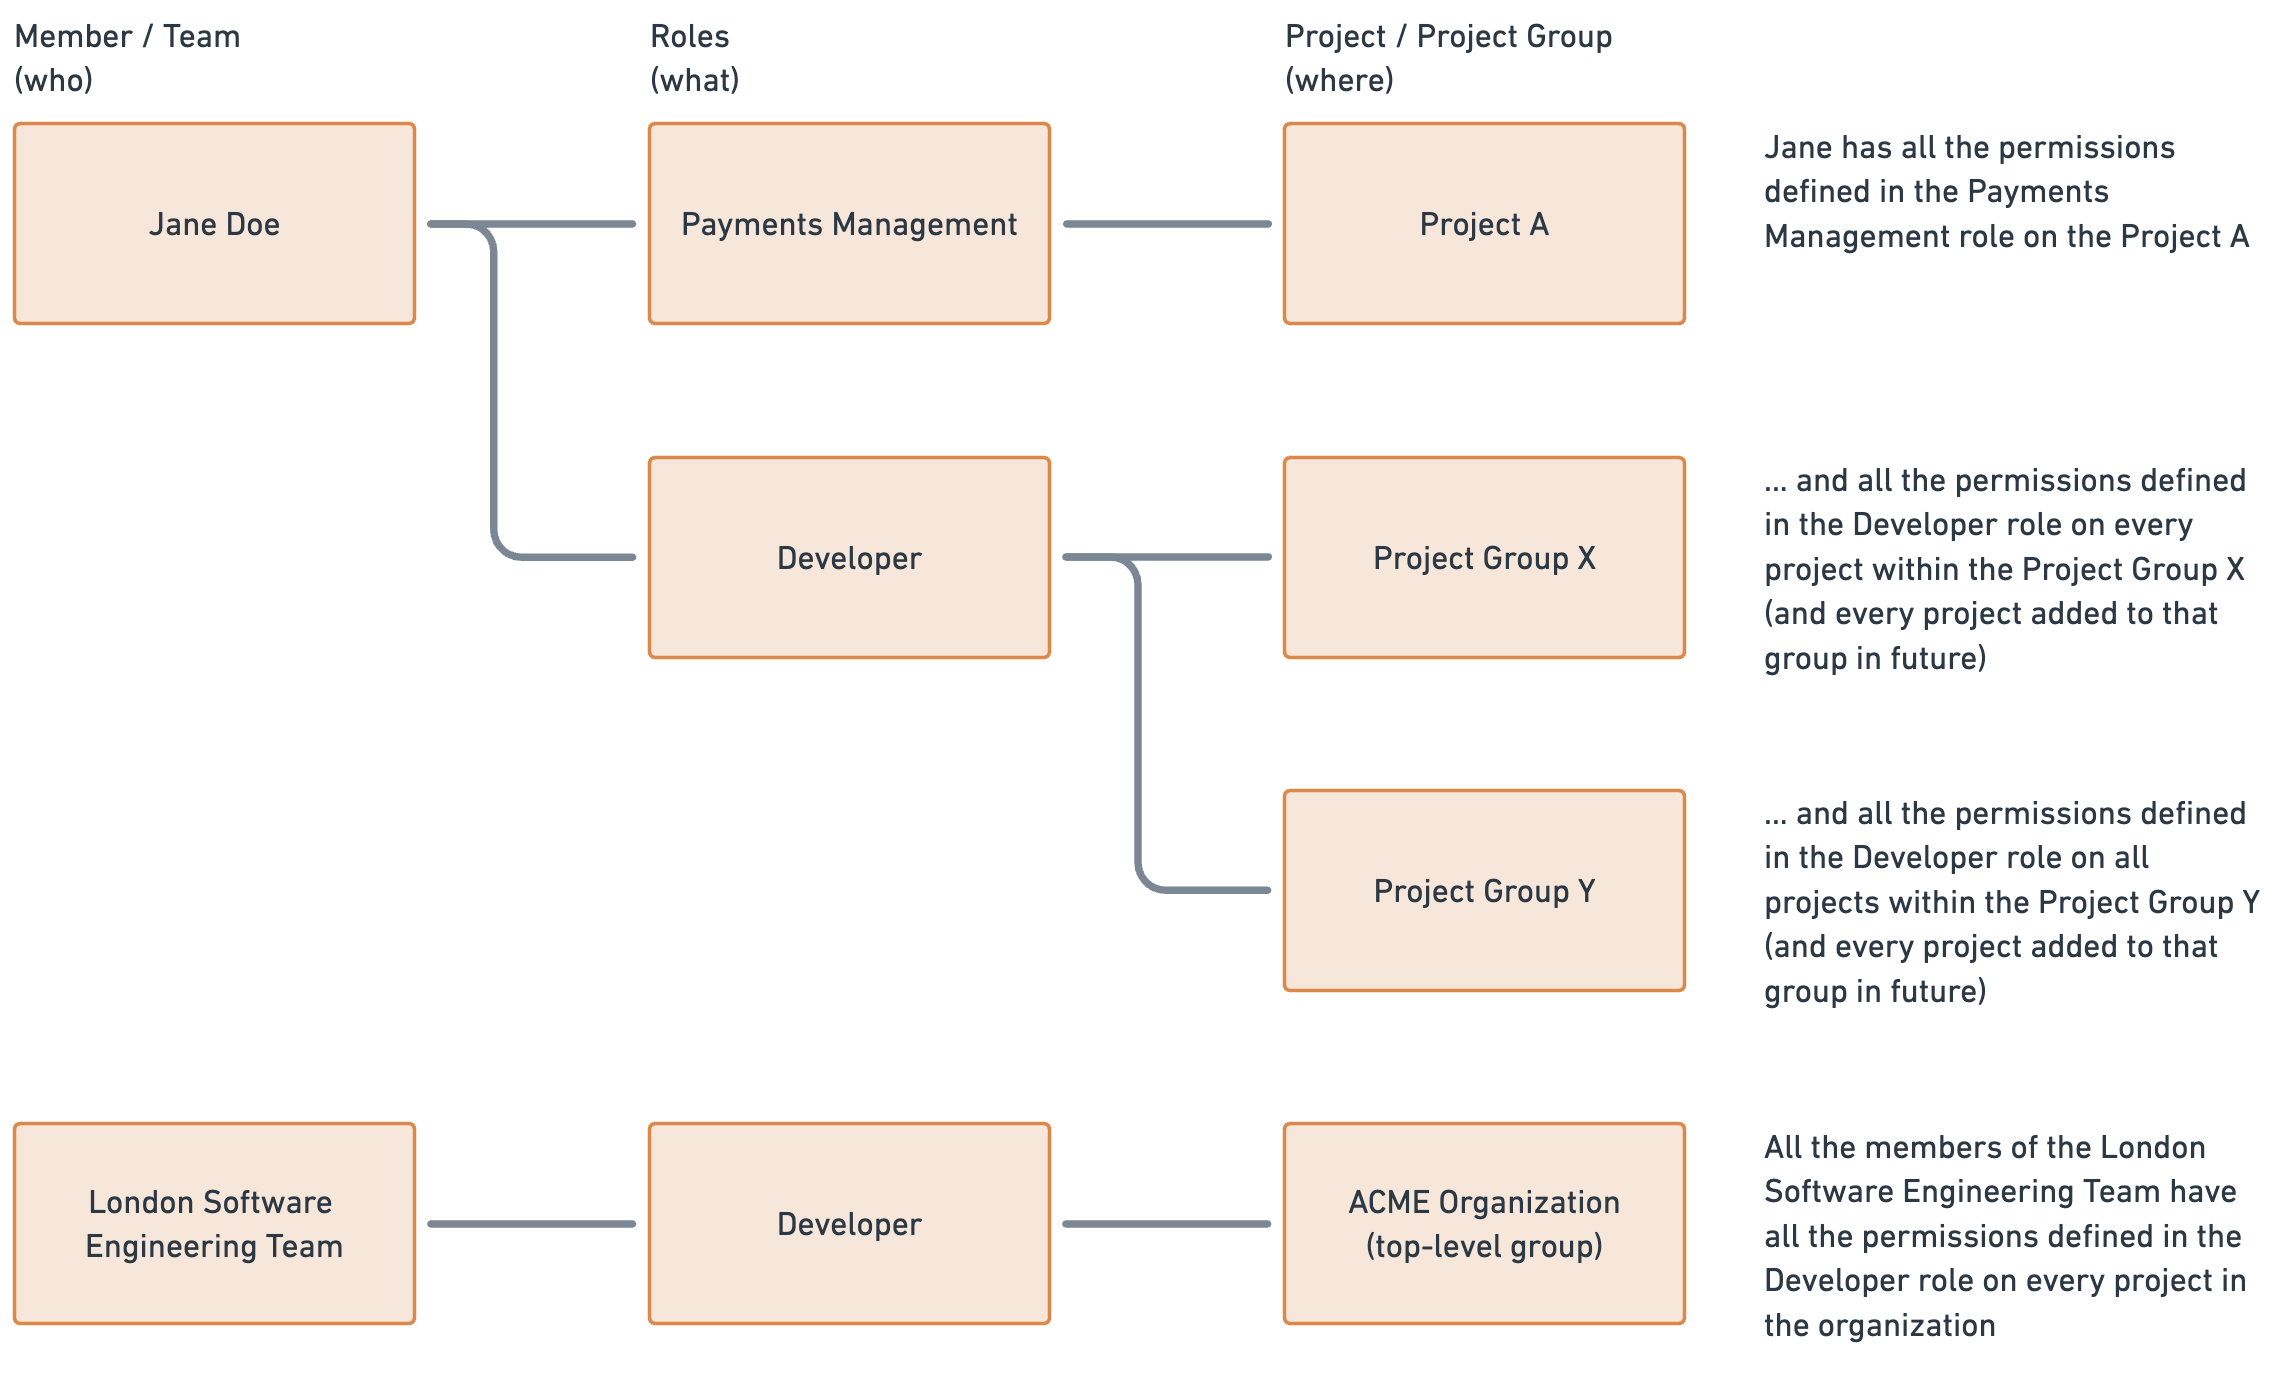
Every member's access level is a sum of the roles defined for this member and the roles granted to the teams this member belongs to.
For security reasons, no member can grant a higher permission than they hold themself.For example, a member having the "Manage roles and permissions" settings will not be able to assign someone else (a person or a team) a role with "Refund transaction" permission on some project if he or she doesn't have that permission on that project themselves. This prevents an unauthorized escalation of privileges.
API access
API access definition is much simpler, as you specify granular permissions directly on a key (roles are not used here). Sandbox keys are completely separate from Production keys (use tabs in the interface to switch between the two). An API key can be attached to one or multiple projects (but currently not to a group of projects). Remember you will only see the API key on creation, and never again – make sure you save it.