Payment page
Learn how to build your no-code customer checkout flow on ProcessOut.
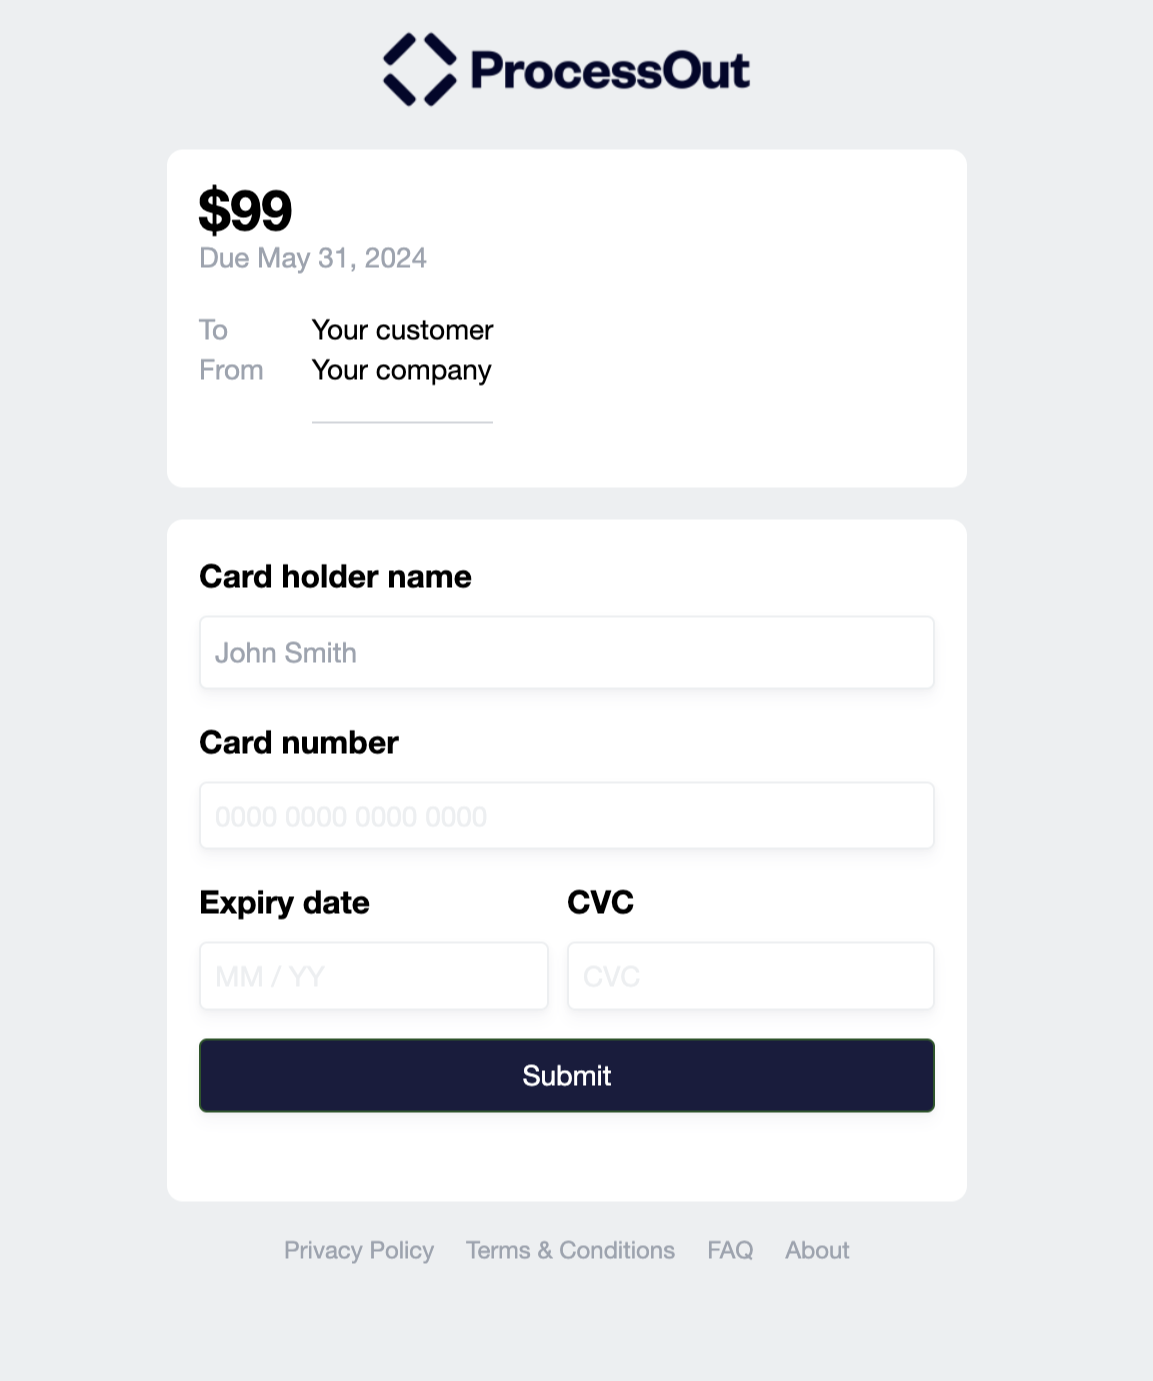
ProcessOut offers out of the box a default payment link that you can use to request payments from your customers. It does not require any integration in your website. You can customize it from the ProcessOut Dashboard to match your brand and your messaging.

Example ProcessOut payment page
Using the payment page
The payment page fits into ProcessOut’s payment flow and uses primitives such as invoices and ProcessOut.js to complete transactions.
Payment page creation and payment completion flow overview
Create an invoice on ProcessOut
Use the ProcessOut API to create an invoice from your backend. Any ProcessOut invoice can be used for transactions using the payment page.
The following invoice fields are displayed by default on the payment page:
- Invoice name
- Invoice amount
- Order ID
- Invoice expiry date
The return URL of the invoice is used to redirect the user after the payment, or when the link is visited after the payment is completed.
Optional: Add structured information
You can display extra information on the payment page using the invoice’s metadata. Follow these steps:
- Add the information you need to the
metadatastructure of the invoice. For example, set amemometadata with more information about the payment. - Update your project settings to expose the metadata key publicly (e.g.
memo).
By default, ProcessOut keeps your invoice metadata private and does not expose it to the client side. You are required to change your project settings to explicitly expose the metadata fields you want to display on the payment page. This data will be displayed in a structured way at the top of the payment page.
We are working to add support for creating invoices manually from the Dashboard. If you are interested in this feature, please contact your ProcessOut account manager.
Retrieve the payment page link from the invoice
Once created, the invoice objects contains a url field. This field contains the URL that you can share with the customer to make the payment.
The payment page link is also available if you fetch the invoice again after having created it.
Optional: Generate a QR code
ProcessOut can generate a QR code for the invoice URL. To retrieve it, set the expand parameter to the property invoice_qrcode.
The invoice object will be returned with the url_qrcode property. The QR code is a base64-encoded PNG that you can embed in your application. It points to the URL contained in the url field.
Optional: enable users to save and re-use payment methods
You can easily allow your users to save and re-use the payment methods they use to pay. This can make the payment flow smoother if you expect your customers to regularly pay on your payment pages.
To do this, you need to additionally fetch the client secret from the invoice response, and pass it through the user’s browser as a client_secret POST parameter. If you do not pass the secret—for example when sharing the link manually, the user will still be able to pay. They will simply not be able to save their payment method and will not be able to view and re-use previously saved payment methods.
The client secret is returned in the x-processout-client-secret header when creating or retrieving an invoice. We recommend retrieving it at the same time as the payment page link (see the previous step).
When redirecting the user to the payment page, pass the invoice secret as a POST parameter to the payment page URL. For example, you can use the following code on one of your pages to redirect the user:
<p>You are being redirected to the payment page.</p>

<!-- Payment page link -->
<form action="https://pay.processout.com/proj_IFCgGTmyClrgTOzsschN1y7GJttHVQ7S/iv_5nIgZwbymtt64OZRv5Uy6HfNOJWa5PVD"
      method="POST"
      id="redirectForm">
    <!-- Client secret -->
    <input value="clt_secret_rf5gleEMI4LpzfDgfO1jTHuAzMycDO5gTM3ED"
           name="client_secret"
           type="hidden">
</form>

<script>
window.onload = () => (document.getElementById('redirectForm').submit());
</script>
The POST scheme prevents users from accidentally sharing their client secret if they share the payment link. Client secrets are valid for one hour. For this reason, you should retrieve a new secret every time you redirect a user to the payment page.
Complete the transaction
After the payment is successful, the payment page redirects the user to the return URL set in the invoice. If the return URL is not set, the payment ends on the success screen.
You can get the result of the payment in the following ways:
- From the ProcessOut Dashboard: the transaction will be listed on the Dashboard, along with its status. You can use Dashboard search to find the invoice.
- From the ProcessOut API: your backend can fetch the invoice to get the transaction status once the user is redirected to the return URL. You can use this status to update the state of the payment in your system.
- From webhooks: your backend will receive ProcessOut as normal during the payment flow, so your system can also listen for the result of the payment asynchronously.
Customizing the payment page
Within the ProcessOut Dashboard, you can customize the following elements of your payment page:
Customization | Notes |
|---|---|
Logo | Allowed file types: |
Theme color | Hexadecimal color |
Button text color | Hexadecimal color |
Structured information | Display custom data on the payment page. See Add structured information for more information. |
Links in footer | Text and URL for links. |
Link expiry and cancellation
You can define an expiration date and time for the payment link by setting the invoice expiry date (expires_at field in the invoice object). After this date, the payment link will not be available for new transactions. Expired invoices still support voids, captures, refunds, and other operations linked to already-authorized amounts.
You can also cancel a payment link before the payment is attempted by using the ProcessOut API to delete the invoice.
Updated 4 months ago
